
How To Determine Your Label’s Copy Position
Has your printer asked you for the copy position of your label? How about the unwind direction? The orientation? If your head is spinning, you’re not alone.
These questions are standard for printers to ask, yet most buyers are confused by the jargon. Even seasoned buyers aren’t always sure what’s being asked of them when a printer requests the copy position of a label.
What is the Label Copy Position?
The Label Copy Position is the position (or direction) of the artwork. It’s the way the copy or text is oriented as it’s placed. It also signals how the copy will unwind from the roll.
How your labels are applied is critically important. They can either be manually or automatically applied to your container. The method of application affects the placement of the label on the container, as well as the tooling that will be used.
Although you might have a better understanding of what Label Copy Position is, you are probably still scratching your head about what you need to give to the printer. Stick with us (get it? label humor!). Here is a step-by-step guide to determining copy position. When you’re done reading, it will be a cinch! And don’t miss the handy, dandy reference chart at the end.
If your labels are machine applied, there are two key factors that you must know:
- The Text Direction: This is key. You must tell your printer which direction your text needs to run when dispensing onto the container. Will it dispense first from the top or bottom; or first from the left or right? Not sure what you need? Ask the company applying your labels for the copy position they require for their application equipment.
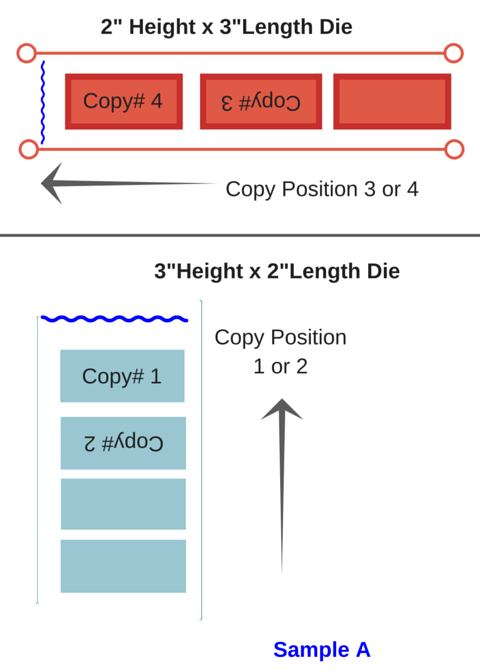
- The Layout of the Rectangle: Is the rectangle layout on the roll web in the portrait or landscape position? This makes a big difference. For example, applying a 2” x 3” label is significantly different than applying a 3” x 2” label. See Sample A.
Note: When a label printer is trying to see if they have an existing die that will work for your application, this is what they are considering.
Figuring Label Copy Position for an Equal Dimension Shape
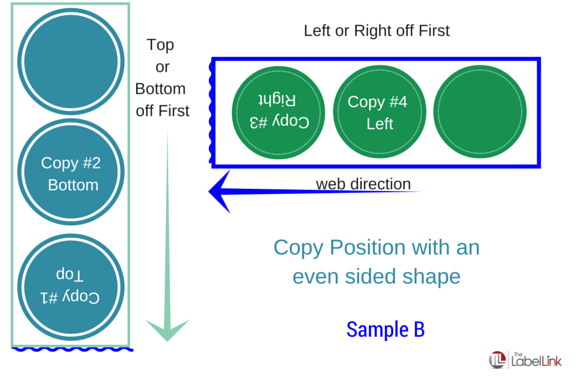
If the shape has equal dimensions, such as those often found in a circle or square, the only
consideration for copy position would be how the art is positioned in relation to the liner. See Sample B.
What About Label Copy Position for a Special Shaped Label?
If your label is a special shape, make it easy on yourself and still focus only on the rectangle.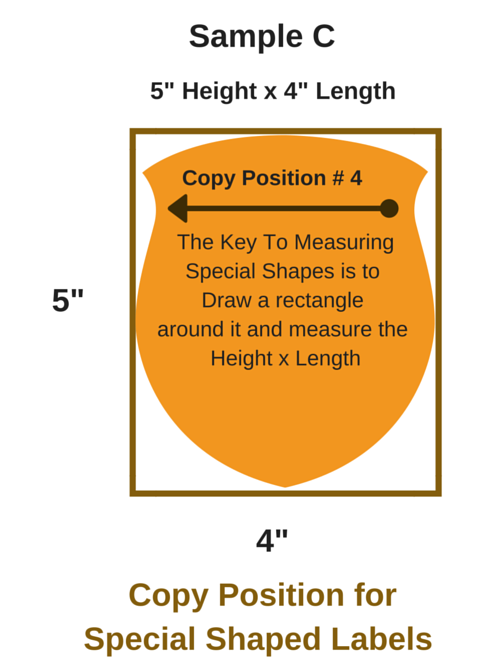
Creating a rectangle around the furthest points in your design will help you configure the most accurate dimensions. With this rectangle, the copy position can then be determined by the direction of the text. See Sample C.
Keep in mind, with special shapes, a special die would more than likely need to be ordered.
Determining Label Copy Position for Hand Applied Applications:
Good news! If your labels are hand-applied, determining the copy position is not required. Because you can generally apply a label by hand in any direction you need, getting an accurate placement is a non-issue.
With hand applied applications, your biggest concern is ease and cost containment.
Ease. Most people are right-handed. The position of the label on the liner may be more or less convenient depending on which hand is dominant. If you order labels best suited for a right hander but a left hander is applying them, you’ll make the job more difficult than necessary.
Cost. A label printer has a large inventory of tools available. Talk to your printer about how you might be able to save a one-time tooling cost if their existing tool can be used. Saving money is always good.
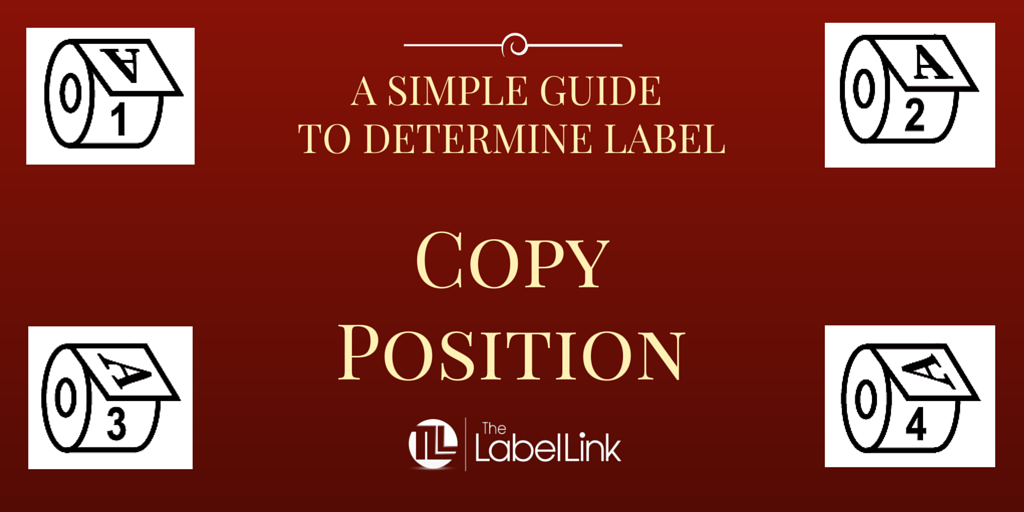
The Four Most Common Label Copy Positions:
Other printer jargon you might encounter while trying to determine your Label Copy Position is how the text is dispensed. Here are the four most common positions and their terminology.
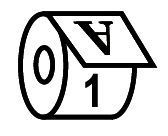 1. Top Off (Label Copy Position #1): Label dispenses from the roll with the top or head of the label leading.
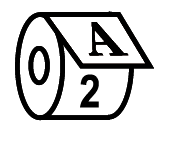 2. Bottom Off (Label Copy Position #2): Label dispenses from the roll with the bottom or foot of the label leading.
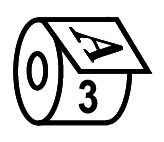 3. Right Side Off (Label Copy Position #3): Label dispenses from the roll with the right side or right edge of label leading.
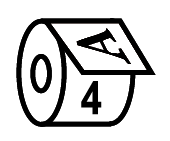 4. Left Side Off (Label Copy Position # 4): You probably have the hang of it now. Left side or edge of label leads the roll.
It’s Important To Get It Right!
Let’s recap. It’s critically important for machine applied labels to print in the correct copy position. If they’re incorrect, your label will be applied up-side-down or backwards.
It is equally essential for the label manufacturer to know the Label Copy Position in order to provide a firm and accurate price. To label companies, it’s all about their tooling and how to make your label with it. It doesn’t matter how you need your label to dispense, as long as they know ahead of time so there no additional costs sneak into the mix, catching you by surprise.
Question: Have you ever struggled to get the Label Copy Position Right? Share in the Comments Section. We’d love to hear your story.
The Free Resource We Promised
In the rare event that you need your labels wound inside (as opposed to the standard outside wind position), there are 4 more copy positions. They are essentially the same as the four above, but just wound in. We have a chart that will quickly demonstrate it for you.
Download the handy, dandy copy position chart that we promised for a great reference tool that you can keep at your desk.
And, if you are still unsure about the direction of the copy, we are happy to help. Just Contact Us with a PDF of your art file along with the applicator’s required unwind position and we will get back to you with the correct label Copy position number.